Sunday, January 17, 2010

Braiding and Beading!

Here's a quick how to "Braid and Bead" with tons of pictures for you to follow! 

Braiding and beading are great for little girls (and if you pick the right beads, boys too).  My niece can keep a style like this in her hair for up to 1 and a half months.  We are currently on week 2 and going strong!

Materials Needed: Beads, Beader, Rubber bands, Time, and
Patience (an extra dose if this is your first time!)

Front Finished


Back Finished

Side View

Step 1: Parting


Directions: Part hair in the direction you want to braids and beads to lay.  I parted her hair down the middle both vertically and horizontally (towards the back of her head).  Then, I decided I wanted 8 braids going across the front (4 on the right, 4 on the left).  The rest, I pinned back until I was finished with the front.


Step 2: Braiding

Directions: Remember braiding your dolls hair or braclets?  Well, cornrowing is the same concept, EXCEPT, the object is to attach the braids to the scalp so that it sticks to the head.  First, part your row based on how big or small you want your braid.  The more hair the bigger the braid.  Then, pick up 3 strands of hair from that row (all aligned).  Begin criss crossing them over one another.  BUT, when you cross them over to the middle, PICK UP more hair from the head and
                                                       continue braiding and crossing.

She is really just faking! Getting her hair done is such
an ordeal. NOW, that she knows she has a camera
in her face, she's milking it for all it's worth.
Braiding can be painful, but you'll get to know your child's
temperment quickly (what their scalp can and can't withstand!).

  This is the braid at the very end.  See the size
  of the row?  I wanted a smaller braid so I part
 the row smaller.

Step 3: Beading:
 Directions: Once your braids are all in or one is completed or a row (however you decide) you can add the beads.  In my hand are beads (which can be mixed and match creatively!).  Today we're just using white.  With her, we usually go with pink because she LOVES PINK (as you can see by her shirt).  I'm also holding a beader (the long thing with the loop on the end).  I'll attach my beads to this. 


 PART 1: Add beads to top of loop (pointed edge).  They will just slide down.


PART 2: Place end of finished braid through the loop.


PART 3: Push the beads up toward the very top of the braid (the scalp). As you are pushing up the beads, pull back the beader, slowly. The beads will then attach themselves to the hair.  Pull beader completely back and get a rubber band.  On African American hair, black rubber bands are the best to use because they blend in with the hair.   PART 4: Take last bead on braid and put a small gap in between that bead and the rest of the beads.  Fold the remainder of the hair over the last bead. Take a rubber band and begin to warp the rubber band around the folded hair and last bead.  This will secure the beads and keep the ones on top from falling off.  When the rubber band can no longer wrap, push the tops beads down (carefully) so that they cover the rubber band and touch the last bead.
Step 4: Finishing:
Directions: Continue to braid and bead throughout, deciding on what style you want. You can use a few or as many beads as you'd like. Aim for symmetry! What you do to one side, do to the other. It'll look better in the end.


"That's All Folks!"
Time: 1.5-2 hours (longer for first timers)
Length Style Should Remain: 1.5 -2 months
Cost: Free (all materials on hand)
*If you do not have the materials, beads cost $3.00-$5.00 pack, beaders cost $2.00, and rubber bands cost $.99-$3.00

Friday, January 8, 2010

Freedom!!!!!!!!!

Crazy, Wild, and BEAUTIFUL!


It doesn't have to be contained!  That's right!  STOP trying to make sense out of natural, African American hair.  STOP trying to make it go straight or lay flat.  It can be wild and crazy and fun and beautiful.  Yes, beautiful! This is just a quick style because she wanted something "fun".


My favorite way to describe the beauty and versatility of African American hair is through this video:
Hair Chronicles of Little Black Girls: http://www.youtube.com/watch?v=yQuJMhAzz1o
It's 4:35 but it's worth every minute. It celebrates the history of African American culture and hair and some of the possibilities for young girls.  It teaches young girls to love their natural hair and celebrate their heritage.
It might even give you some ideas!

Inspiration:


Celebrate!


Take Pride!


THINK: Beauty!


Imagine&Create!


To natural, beautiful, YOU!

More Braids!


I love doing braids on her hair because she does such a geat job of keeping them in. I'll have to film myself braiding next time so you can get an idea (if you don't already know how to braid).  Cornrows are great for boys too!! You can add beads (yes, even to a boy's head).  I'll show you later how to add beads the easy way!  And your child can help you bead, it makes the process go much faster!


If You Can't Stand the Heat...

STOP!!! Put down the straightener and the curling iron! Step Back!


One of the most important things you can do for your hair is to stop damaging it with over use of heat!

If you're really going to go natural, that means no more or way less straightening, I mean it! Does that mean you can never apply heat again, well, of course not. But it means instead of straightening your hair everyday you should aim for once a week. This is especially important if you plan on transitioning out (not doing the BC right away).  Your hair will stay stronger and grow healthier when less heat is applied.
 
And Most Important: USE A HEAT PROTECTANT (see "Product Junkie Post).
 
I spent a long time looking for straighteners that were good for natural hair.  Here are the top 4 that I recommend, after months of research (no, I'm not kidding or being dramatic). 
 
I've found that the most popular flat irons (not all of them, just the more popular ones) that the African American women were selecting were based on how straight and shiny it could get their hair.  And I found them all to be expensive, but cheaper if you ordered them off-line versus going to a hair store.  If not ordered off-line, you can find these at Ulta, Target (the CHI), Sallys or an ethnic hair store.
 
Gold and Hot.  This is an all time favorite and the least expensive!
These are ceranmic, which help protect the hair. $40.00-$70.00


FHI.  This is the second most expensive.It's popularity continues to grow.  Many find it better than the CHI (below) because it is more cost efficient and has heat control. Price: $70.00-$90.00

 CHI.  Everyone loves the CHI!  It does what it promises.  There is the CHI with the temperature control and the CHI without.  It's recommended to get the CHI with the temperature control!  Price: $99.00-$250.00


SEDU: Now, this one isn't as popular as all of those promoted on youtube.  However, this is one I found, in blogs, to be a favorite.  I did buy this one, after much debate because it had a higher temperature setting and users claimed it left their hair feeling light and healthy.  I totally agree.  I do not use it personally; however, I do use it when I do other people's hair.  I love it.  Price: $210.00-300.00


  Suggested Heat Protectants:
1. Chi Silk Infusion/Infra Treatment
2. BioSilk
3. Olive Oil Heat
4. Silk Elements Protectant
5. IC Hair Polish Heat Protectant

Kinky Twists-BIG!

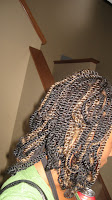
Kinky Twists are a popular hair style, with the use of extensions, in the African American community. The great thing about this style is that if maintained, it can last up to 2 months.  This is great news for parents  who don't want to do their child's hair everday.  It does not strain the hair and it serves as a protective style.  Best of all, it's easy to maintain! 

BUT, little girls do not like to sit for the 3-5 hours it can take.  So, for my nieces, I used bigger, boxed, kinky twists (again, using the Marly Braid hair posted earlier).

Later, I'll post a how-to-video (later meaning when I do them next!).  Take a look.

This is the beginning, on my head, done by myself.  Again, normally, the boxes are not boxed (random hair is just picked up so that it looks more natural.  The parts are WAY closer together, but I can't sit that long either and my arms get tired!). 

Now, all the twisting is done and I've boiled my water and I am beginning to dip them in the water.
 It really isn't scary, I'm just pretending!

 The Final Product!

Overall, I am pleased for it being my first time.


Now for the Girls!!


More Please!
Sometimes styles are trial and error on her because she has such an older face they make her look younger and throw the style off.  So, we're always experimenting to find the right, age-appropriate styles for her.  We're still learning.


Naturally, Beautiful (more on the outside than the inside sometimes)!


My little brother took this last picture.  Cool, huh?!  He talks about wanting to be a photographer someday!